Sunday, 7 October 2012

Photo BTS Sunday!!


This blog has been criminally neglected of late, for which I apologise profusely. In an effort to keep things active here I’m going to try a new approach, in the shape of Photo BTS (behind-the-scenes) post. These will (hopefully) be posted at least weekly and will just be a quick walk through of the story behind on of my images; what the conditions were like, what challenges there were and any silly little anecdotes that seem appropriate at the time. I’m not saying that’s all I’ll post from now one but it’s something that should keep the cobwebs at bay J

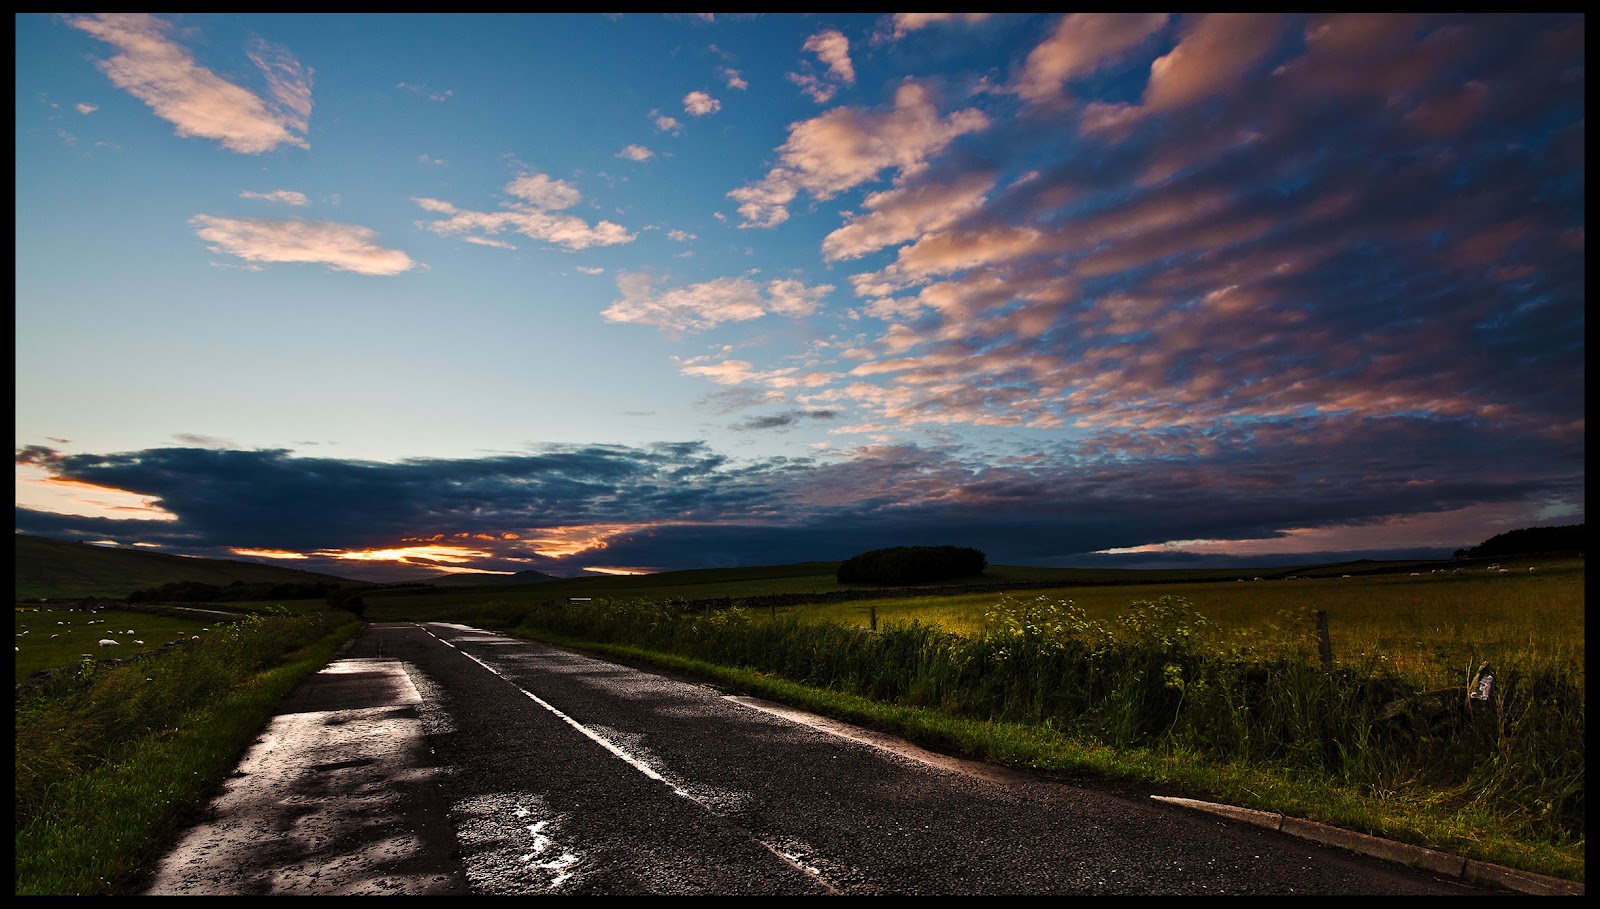
So here’s the first of the series. This image was shot only a couple of weeks ago in the Lake District, near Ullswater. The hill is actually known as Round How and forms one of the shores of Ullswater itself. I was standing in a field near the entrance to the path leading to the waterfall Aira Force, which is the main thing we’d come to see. I took some images in this direction on the way in but none were exceptionally awe inspiring. After visiting the waterfall however, when we passed the same spot I noticed that the light was significantly warmer and that there was a slight mist hanging over the valley. Since the plan was to head home (we had a long drive ahead!) I didn’t really have much time to set everything up again and so had to commit to the cringe-worthy task of resting the camera on a wall, which was far from stable. I had my tripod with me but it had walked off along with a family member and was already half way back to the car! I shot a quick series of images, varying the focal length as I went. I immediately knew that the tree in the foreground had to be part of the composition and by using the long end of my 17-85mm zoom (which works out as 136mm in 35mm terms) perspective was compressed slightly which firmly placed that tree into the scene, providing a sense of depth. The rain clouds were rolling in which gave that biblical sky and the mist picked up the colour of the light, bathing the landscape in a golden glow. The painful thing was I could foresee things getting even more dramatic in the following 30 minutes or so, by which time I knew I’d be back in the car and driving away from it all! However, after about 10 minutes the light started to fade and that rain became the dominant feature of the scene, which acted as a strong motivation to pack up and move on.

I had my camera set to Cloudy White Balance but when reviewing them later the colours didn’t seem as warm as I remembered them so I increased Colour temperature in Camera Raw and added a little Magenta using the Tint slider.

This shot was more about luck than careful planning. Where possible I love to be able to plan everything before a shoot, but I think that’s more to do with peace of mind; sometimes a scene just presents itself and you have to work quickly to catch ‘the moment.’ Looking at this picture you’d think the light was a gift from heaven but it was actually very short-lived and we barely made it to the car without getting soaked. As always say, the Lakes isn’t the Lakes for nothing…all that water had to come from somewhere!

Camera: Canon EOS 7D

Lens: 17-85mm

Filters:  Polarizer, ND Grad


Ok so there you have it, the first Photo BTS (which, I admit, does sound a little like a fungal infection) and hopefully I’ll keep on track and rack out a few more over the next little while.

 
Stay tuned J   


Tuesday, 28 August 2012

My recent publications

Sorry for yet another absence but things have been sort of hectic! My aim is to get a few more posts rolled out before I head back to Uni so lets just keep our fingers crossed :)

If you want to read more about my photography I've been featured in a couple of publications this month. Firstly several of my images have featured in Amateur Photographer Magazine this week (wk beginning 25.08.2012) where I gained the Editor's Choice in the Reader Spotlight pages. This is the third time I've been in the Spotlight so it's nice see my shots there again.

Also I've written a short landscape photography masterclass for North East Life Magazine (http://northeast.greatbritishlife.co.uk) in their September issue. Here I just cover the basics from composition and lighting to recommended camera settings and selected, freely available software. If you're new to photography and live in or around the NE of England, you might want to pick up a copy. You also get to see a wonderful mug-shot of me looking like death itself on an early morning coastal shoot!

So yeah, I'll truly make an effort to put some Time aside for the sole purpose of blogging ")

Peter

Monday, 2 July 2012

Heyy...I'm still alive! (from Scotland)


Ok so first of all I’d like to apologise for my absence of late; I’ve just been crazy busy with just about everything! I’m pretty sure I promised a post about my Farne Islands visit about two years ago but I will get there eventually (even though nobody cares now…including me)

Anyway, I’m away from home at the moment (I’m currently sat writing this in a small cottage about a stone’s throw from the England/ Scotland Border.) I’m staring out of my bedroom window at a wonderful, beautiful, wet, stunningly secluded, miserable, relaxing, depressing view of our private garden and wishing either the weather would improve, or the world would just go ahead and end as it’s been promising to do for weeks! 

I’m determined not to let the rain and wind (and lighting and flooding and mudslides!) stop my picture-taking however; I think it’ll be good practise to shoot in less-than-ideal conditions…damn my optimistic nature J I did manage to grab some nice (warm) shots the other evening when there was a dusk to speak of, so at least I got them in the bag early on (see below.)


I’m certainly not travelling light though; the relative closeness to home provided too many gear temptations and I can’t think of anything I’ve left behind! I’ve got both EOS digital bodies with me (my 450D and 7D) as well as my 10-20, 17-85, 70-200, 50 and 35-70mm lenses, plus a flash, radio triggers etc. and I’m hauling it all around in my Lowepro Vertex 200AW. I’m hoping to go back to the Edinburgh Botanic Gardens before we head home and we’re here ‘till Saturday so hopefully I’ll come back with some “Keepers.”

I’ll keep you all posted when possible…J   
Peter x

Sunday, 6 May 2012

Shooting the blossom


First of all I’d just like to apologise for my recent absence, but I have been kinda’ snowed under with work, so…sorry! Unfortunately, the aforementioned work has also prevented me from getting out much with my camera, although I made a real effort the other day to make it up to the University Botanic Gardens, Durham to shoot another seasonal must…the blossom. I pretty much missed it last year and almost did again; a lot of the stuff had already fallen, no thanks to the recent spell of rain and wind we’ve experienced in Britain of late. There was just enough left on the trees to capture some reasonable, colourful close-ups. There’s a lovely area of these gardens called the Japanese Friendship Garden that’s surrounded by blossom at this time of year and while the trees weren’t as full as they might have been a week or so back, this was the first place I headed.


I had intended to shoot some wide-angle images, taking in a broad expanse of the garden, with the vibrant pinks and reds as the focal point. However, the slightly bare-looking trees didn’t seem to make a wide focal length appropriate. I therefore shot all afternoon on my 70-200mm optic, concentrating on isolating individual flowers and branches. Most of these shots were made racked-out at 200mm and wide-open at f/2.8 to throw the backgrounds out-of-focus. The large aperture also allowed me to handhold the shots, which although not ideal, was necessary due to my tripod not extending tall enough to shoot the hanging branches straight on. I composed these examples so that the backgrounds consisted of bold colours to compliment and/or contrast with the blossom. Most of the time I arranged the shots so that other blossom-filled trees were visible as a blur of complimenting colour. For the final shot here, I was shooting from a kneeling position, near the ground, with the bright blue sky behind. Ironically this image was taken in the car park, before driving away; the others were carefully framed and well thought-through, while this was basically a snapshot…click and go! It also happens to be one of my favourites from the shoot. 


f there’s one bit of advice I can convey about shooting boldly-coloured plant life such as blossom, it’s to do so under overcast lighting; sun spots and dappled light just ruin the atmosphere completely. The diffused light from the cloudy sky is perfectly soft and ‘wrap-around’, and is nature’s very own soft-box, studio light. The colours will be far more saturated than under direct sunlight to, but without looking false; they’ll be natural! I also like to underexpose slightly in these circumstances, which did here buy about 1 stop, as this further adds the “punchiness” of the tones.     

That’s all folks...!

I’ll try and post a bit more regularly than once every decade from now on J

Peter  x

Friday, 23 March 2012

Adobe announces Photoshop CS6 Beta!

Big news! Adobe finally launched the beta version of the brand new Photoshop CS6. It was expected to be released this year and it proves not be a disappointment! I guess there’s always going to be a lot of hype when Adobe launch a new product, but Photoshop seems to be the software people like to see new versions of the most- after all it’s  for designers as much as photographers. After CS5 was released I kinda’ wondered what more Adobe could do with the program, it appeared to have had a complete overhaul from CS4; new lens correction feature, superlative selection tools, crazy awesome Photomerge, brand new built-in HDR tool complete with one of my favourites, HDR toning etc., etc. Well I went ahead and downloaded the beta version of CS6 to see what it has on offer over its predecessor- and knowing Adobe, they’ll completely destroy my doubts about the limited scope for improvements! Let’s take a look…

Brand-new, totally awesome Camera Raw

Since I learned how to use it properly I’ve fallen in love with ACR! I never thought it possible, but with version 6 I could virtually edit from start to finish right inside that window without leaving and diving into ‘proper’ Photoshop. The range of sliders and adjustments was really very impressive and now in the new Camera Raw 7 things have gone even further. When you open up an un-edited RAW file (or one that has been edited in version 6 but run through Photoshop’s update algorithm) you’ll see a same-but-different window. Some sliders you’ll recognise, others are totally new. Basically what Adobe has done is take the new Develop module out of Lightroom 4 and placed it here; after all, the Develop window is Camera Raw in all but naming. What they’ve done is slightly rearrange the sliders into a more usable order and add new sliders such as Highlights, Shadows and Whites that control the shadows, highlights and mid-tones independently. Noticeably many of the sliders are now set to the middle by default, so you can dial in a negative number, which wasn’t possible in ACR6. The Clarity, Vibrance and Saturation sliders are all still in the same place but can I just say that the way Clarity now works is great. This is by far my favourite tool in ACR anyway, but the look it gives your photos here is far more natural and much less ‘processed.’ Having given shunting it all the way to 100 a try I’m happy to report that in many cases this will be a more-than- acceptable practise.

Another thing I’m loving (terrible grammar I know!)is the re-designed adjustment brush. Now you can easily make selective applications of Noise Reduction and even White Balance/Tint! This is gonna prove unbelievably useful for so many people is so many situations that I think it will become a favourite amongst photographers who, for example, are dealing with varying lighting conditions out on location. The NR option is huge for me as someone who has been shooting a lot of HDR images of interiors for commercial uses; HDR inevitably produces noise and the ability to apply selective NR to flat areas when editing the original tone-mapped TIFFs, without opening two documents in regular PS is a real time and effort saver. These sliders are also available through the Graduated filter, which means reducing noise in the flat tones of a sky whilst simultaneously darkening it, kills two birds with one stone. All good J

Content Aware Patch
It was only a matter of time before they grouped these two tools together. The patch tool works great a lot of the time, but by making it content-aware improves the overall integration of the patched area, making it far less noticeable. Again this will make it easier to patch in tricky areas with complex patterns etc. It works in exactly the same way as the regular patch tool of Photoshops past but is just that bit more reliable; a predictable but useful addition.

New 3D- less clunky and equally useless for most folk!
Ok that’s a bit unfair, but let’s face it- most photographers won’t be using the 3D features in any version of PS. For designers and the like though the new 3D functionality will make your lives less complicated; less complex panels, a new slick look and no more slightly suggestive French words that nobody understands! Corey Barker will know what I mean J There’s also a new dedicated ‘Type’ tab on the main menu that makes accessing the type tools and creating paragraphs etc. quicker. You can extrude a 3D mesh from this menu too.
'Edge Smoothing’ in HDR Pro
Nothing huge but something I’m quite keen on at first glance- this adds a smoothing effect whilst boosting the detail in the image. This gives a fancy ethereal look that I’m not sure is intentional but can be cool. I need to spend more time with this one…
Live brush size/hardness preview!
I punched the air when I came across this one… you can change the brush settings using Control>click (Command>click for Mac users) and a dialogue stays live for the duration telling you your current settings. It’s not a massive alteration but one that makes the whole shortcut more useful. I always like to know my current brush status, particularly the hardness, as a value and before I had to pop up to the brush panel at the top of the screen, which personally I found a bit maddening. No more!

Content Aware move tool
Probably won’t be using this in a hurry but someone will. It works using the regular Content Aware function to allow you to move elements of your image whilst filling in the space left behind. I plan to have a play around with it and see what it’s capable of…
Live crop tool dimensions
Handily it is now possible to alter the dimensions that you want to crop your photos to, whilst looking at the changes live; you can choose a set of dimensions from the drop-down as usual and select a new setting at any point, without having to commit to the current settings and undo if you’re unhappy. Also, as a great composition aid you can select an overly showing not just the Rule of Thirds but also the Golden Ratio/Golden Spiral illustration for accurate post-capture framing.

…To name but a few! These aren’t necessarily the biggest updates Adobe is touting, but they are the ones that mean the most to me. I’ll be interested to see if anything else is added before the final version of CS6 ships later this year J
Disclaimer: I am aware that this blog is named Young, Keen and Penniless and so many of you may be thinking “How can he afford such an expensive piece of software?” Well the truth is I can’t, but I am a student and so through Student Expressware, bought CS5 Extended for 80% off! I’m therefore able to upgrade to CS6 when it becomes fully available. Thought you ought to know!

Saturday, 17 March 2012

A chance encounter!

I spent the afternoon back up on Waldridge Fell today (for the record I do visit places other than the Fell!) and was presented with a fairly nice dusk- nothing dramatic but the light was soft. To be honest I just wanted to get out of the house. You see, we’re getting a new roof and so are boxed in by scaffolding, which I can cope with, but the continuous stream of choking dust and plaster floating into my room from the attic is a bit too much - the whole thing is like something out of a 'Carry On' film where I seem to be 'a little plastered..' No?...Oh well, the point is I wanted some fresh air, which I got because the wind was freezing! Naturally I had landscapes in mind because the other great thing about this location is  the heavy covering of heather, which provides an interesting foreground all year round, even if it’s bare twigs.

I decided on the 10-20mm lens to make the most of this element, whilst taking in the interesting and very threatening cloud formations in the sky. To avoid ‘losing’ some of the more distant elements in the scenes (which can so often happen when shooting out a wide focal length such as 10mm ) I set up my tripod without extending the legs too far, which gave me a low shooting angle. This allowed me to get up close to the heather and accentuate its size. For some reason I still haven’t found time to buy a 77mm adaptor ring so couldn’t easily use my ND grad - I would have had to hand-hold them in front of the lens which I hate doing, and so I bracketed my exposures for each image with 3 frames per photo at around 2 stops apart.


With some seemingly successful ‘scapes’ in the bag I moved on. During the return trip to the car I found something interesting on the path in front of me. At first I thought it might be something unspeakable that a random dog had left behind as a gift, but on closer inspection I could tell it was two toads1. I can’t recall seeing toads this close up in the wild before so quickly switched optics to the 70-200. I'm not entirely sure what the pair were doing but can only assume that they were mating - I’m no amphibian expert but that was the easy conclusion to draw! I didn’t know how timid they’d be and so kept my distance to start with, gradually moving closer firing bursts of images as I went. I suspect they must have been ‘playing dead’ or something similar because they allowed me I closer than I would have expected. Having managed to secure some ‘keepers’, I changed technique and re-fitted the wide-angle with the aim of capturing some environmental portraits. I didn’t want to push my luck by getting too close, as they could’ve easily leapt into the undergrowth by the side of the path and I’d have lost them. Nor did I want to stress them unnecessarily and therefore shot at the longest end of the lens, to fill the frame enough for a successful composition. Honestly, they seemed completely un-fazed by the experience of having a nosy photographer lie on the ground and stick an ultra-wide in their faces J  I spent about 20 minutes with the couple before leaving them to whatever it is they were doing. I was a bit disgruntled by the loud-mouthed guy and the dog with attention deficit syndrome that passed me a while later - since I’d been so careful not to disturb the animals, I had visions of the canine ‘making friends’ with them using his incisors.
I had to shoot all the way up at ISO2000 to keep these hand-held shots blur-free


Shooting down low with a wide-angle lens showed the toads in their environment


Anyway, it was an experience and I’m happy I stumbled across a fascinating event of nature. There’s nothing quite like your first amphibian porn shoot! Ehhemm…

Camera settings

My main priority was ensuring I got some sharp images, free of camera shake and so set my ISO to 800 as a starting point and an aperture of f/4. Once I was confident the toads weren’t going to flee, I began to play with settings as f/4 and at such a close focussing distance just wasn’t gonna cut it depth-of-field-wise. To keep both animals in focus I stopped down the lens in subtle increments all the way to f/11, bumping up the ISO accordingly; I needed an absolute minimum of 1/200sec shutter speed and that wasn’t taking the crop factor of my camera into account. In the end I used a max speed of ISO2000, which gave me a hand-hold-able speed of 1/400sec.

1 For those who care, the organisms here look to be Common Toads (species Bufo bufo) As I say, I’m no expert so if you think differently, please fill me in (with the info, not a blunt object…) J

Look out for some more shots from this trip coming soon on my flickr  x 

Saturday, 3 March 2012

Canon unveil the EOS 5D Mark 3 !!

So after much speculation and rumour Canon finally announced the 5D mark III which, I'm particularly enthusiastic to note, looks to be designed as pretty much a full frame 7D. Considering the release of the Nikon D800 and Canon's own 1DX, not to mention that the 5D mark II is nearly 4 years old, it is not surprising to see this newcomer.

Some key features include a 22mp full frame sensor, 1.04 million dot 3.2in LCD, improved AF, 100% viewfinder coverage, up to 6fps shooting, 61 point AF system, DIGIC 5+ processor, duel card slots (1x CF, 1x SD) built-in HDR mode, ISO 50-102,400 and of course full HD movies. Also borrowed from the EOS 1DX is a touch-sensitive rear control wheel.

It seems interesting that Canon has opted for 22MP rather than attempting to compete with the 36.3 MP of the Nikon D800, although when combined with the DIGIC 5+ processor this should make low-light photography one place where this camera will feel at home. Besides, for most people the 5760 x 3840 pixel files will suffice and the value still places the 5D III as Canon’s highest-res model to date. An added advantage is the significantly faster burst rate than the D800 possible making it attractive to a wider range of photographers (I can see it finding a place in the second-body slot of many wildlife/sports shooters- don’t forget the cropping possibilities.)

Whilst the spec may not be what some were expecting it will be interesting to see the reaction of the pro and semi-pro markets. It can probably be guaranteed that the new camera will be just as popular as its predecessor. Here’s an early Canon promo video:-